Pro Tips on Refinishing Solid Wood Furniture: A DIY-er’s Guide
Updated: December 13, 2021

Refinishing old or antique wooden furniture is a popular hobby and has been growing in interest over the past several years. It’s a creative and rewarding DIY project that can provide you with eclectic and high-quality pieces for your home or office space.
But there’s a lot to know when it comes to taking on a DIY furniture refinishing project. There are specific steps to follow and many factors to consider. Whether you’re restoring a family heirloom or you’ve found a diamond in the rough, the following tips for refinishing wood furniture will help you in your next project. This guide will also help instruct you on how to refinish antique furniture and recognize when it’s time to refinish your wooden tables, chairs, dressers and more.
Wood Furniture Refinishing Supplies Checklist
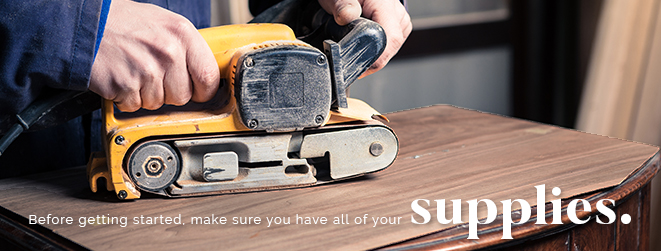
Before getting started on your wooden furniture restoration or refinishing project, it’s important to get all of your supplies in order so you can complete your project more efficiently. Below is a helpful supplies checklist to follow when beginning your next wood furniture refinishing project:
- Dish soap, sponges and towels
- Paint stripper
- Lacquer thinner
- Power sander
- Sandpaper in multiple grits
- Paint scrapers (plastic or metal)
- Epoxy putty
- Wood sealant/Varnish/Polyurethane
- Wood stain or paint (Minwax is a great brand, be sure to pick the correct color!)
- Drop cloths
- Wax coating product
- Eye goggles
- Chemical-resistant gloves
- Vacuum cleaner
Other supplies that may come in handy include:
- Paintbrushes with natural bristles
- Painter’s tape
- Plenty of clean rags and cloths
- A bucket for clean water
- Stir sticks
- Empty paint or coffee cans
- Glue and clamps for repairing and reinforcing furniture
Deciding When to Refinish Antique Furniture
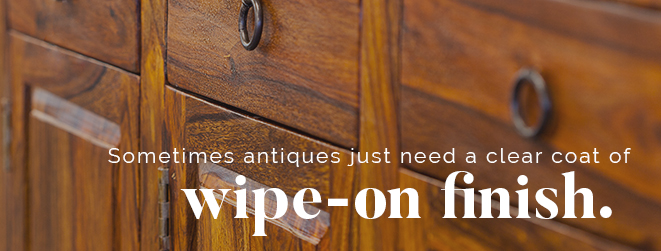
Before diving into stripping the finish off your wood dresser, table or chairs, you’ll first need to decide whether it should be stripped at all. Sometimes, the wood doesn’t need its existing finish stripped away. Rather, all it needs is a clear coat of wipe-on finish to revitalize it.
Many furniture refinishing and revitalizing enthusiasts and experts are against refinishing wooden furniture for fear that it will reduce the piece’s monetary value. However, the other camp of furniture restoration hobbyists and pros will argue that refinishing furniture extends the piece’s longevity. They feel that if your purpose isn’t to obtain a monetary return on your investment in the piece, then restoring and refinishing a piece allows you to get more use out of it long-term.
If you’re wondering what signs you should look for when deciding to refinish antique furniture or if you should restore it at all, there are some initial considerations to look at. The first step should be to look at the unique piece and determine whether it’s worth undertaking a restoration project or not. Ask yourself some of the following questions:
- Is the piece painted? If a piece is painted, there’s usually a reason for it. Owners paint over pieces when they are trying to cover up dents, stains and other imperfections. You might be getting more than you bargained for with a painted wood piece. In some cases, you may be better off choosing a piece that only has varnish on it.
- Was the piece built solidly? Pieces from before the 1960s are generally built from solid wood. Any pieces after that aren’t usually made from solid wood and are instead made from laminates and particleboard. These materials are usually not worth refinishing. On the flip side, older wooden pieces from before 1850 can be quite valuable. If you aren’t sure of a piece’s value, consult an antiques expert before starting a refinishing project.
- Is it stable or will it need to be re-glued? Test out the sturdiness of the piece. If it sways from side to side or if it’s uneven or coming apart anywhere, then it will need to be taken apart and re-glued (and held together with a clamp until the glue dries) to ensure it’s stable. Ask yourself if this is a step you’re willing to take. If so, can you do this yourself or will you have to hire an expert to do it? If you’re specifically wondering how to refinish wood dressers, pay attention to the drawers and whether they are holding together properly.
- What will it look like when it’s refinished? Often when an antique is refinished, it can turn out darker than the original wood. To get an idea of what the finished state will be like, find an area of the piece that’s still original and in-tact. Whatever color it is, expect the final product to be darker. Also, ask yourself if you like the wood grain or not. If you don’t, then it’s not worth investing your time in refinishing the piece if you plan to keep it for your own use.
Based on your answers to these questions, you should be able to determine how much of your own sweat equity you’re willing to invest into a furniture restoration project. If you decided to move forward with a furniture restoration project after answering these questions, then the next step is to determine how you will restore it.
Choosing How to Restore Wooden Furniture
Refinishing wooden furniture isn’t the first and only option when it comes to bringing a piece back to life. Instead of refinishing the piece completely, you may decide to simply rejuvenate or repair it. Here are three main categories of furniture restoration projects:
- Rejuvenate: By keeping the existing finish, you can simply clean and wax the surface and revive the piece. This is the simplest method, and it works on wooden furniture that’s still in good condition.
- Repair: Without stripping the finish, you can repair dents and cracks by touching up certain worn-out areas. This method allows you to keep the finish but use special products to fix up the piece.
- Refinish: Using a finish-stripping product or power sander, you can remove the current finish, make any necessary repairs and touch-ups and then apply new finish.
With these options in mind, you may still be wondering if refinishing your wooden piece is the right way to go. If you’re uncertain, then you should be aware of the different signs that indicate it’s time to refinish your wood furniture.
Signs It’s Time to Refinish Your Furniture
There are several different signs it’s time to refinish your wood furniture that you should be aware of when starting a restoration project. These include different items to look for and the different methods you should use when looking for these signs. Here are some of the ways you can tell if it’s time to refinish your antique and wooden pieces:
- There are noticeable rings and watermarks under the existing finish.
- The surface feels sticky even after it’s been cleaned.
- There are worn-out patches and blemishes even after it’s been cleaned.
- The wood has become dark from the clear coat turning color.
- The existing finish has cracked down to the wood.
- The finish is flaking and chipping off.
If your furniture piece is exhibiting any of these signs, then it may be time to refinish the piece. Even if the piece doesn’t portray all of these signs, you may still feel that its current state looks hideous and you’d rather just refinish it entirely.
But, before going to town with the chemical stripping agents on your wooden furniture, you can use the mineral spirits method (see video below) to determine if the piece needs to be refinished or not. This involves pouring some mineral spirits over the surface of your wooden chair, table or dresser.
You can wipe on the mineral spirits over a patch of the wood and wait for it to saturate. This will reveal how the finish will look if you skip the refinishing steps and just apply a clear coat. If the finish looks good, then you don’t have to dive into the refinishing process. Instead, you’ll simply clean the piece and apply a clear coat finish.
Our Best Tips for Refinishing Furniture
If you’ve decided that you are going to move forward with refinishing your wood furniture, then there are a few guidelines to follow.
Below are six essential steps that address how to refinish wood furniture and how to strip finished wood:
Step 1: Clean the Piece
The most fundamental step of any furniture refinishing or renewing project is to give the piece in question a good and thorough clean. This is especially true if the piece has been in storage or has been kept outside for an extended time. Additionally, if you don’t know exactly where the piece came from, it’s likely covered in a layer of grime from dust and dirt buildup.
Many people think that using a heavy-duty cleaner will work more effectively on an especially dirty piece. However, the simplest and most effective way to clean the piece and protect it is to simply use a mixture of dish soap and warm water. Some of the pros suggest using Dawn or a similar brand of dish detergent to get the job done.
Scrub down the surface using gentle strokes with a soaped-up sponge, or use a paintbrush if your piece has moldings and carvings to get into. Once you’ve scrubbed the surface clean, rinse it off with fresh water using the wrung-out sponge. Once the soap has been cleared away, pat the piece dry with a towel.
Step 2: Assess the Furniture’s Current State
Once you’ve cleaned the piece, you’ll have a better idea of the overall scale of the project. If you’re dealing with an especially old piece, you may find there are white rings, paint stains, dents, chips and cracks.
Take an overall assessment of the piece and determine what will need to be done to make these repairs. This will help you determine which supplies you’ll need such as scrapers, epoxy putty and wax filling compound.
Step 3: Remove Old Finish
If you’ve never done so, then you may be wondering how to strip finish off of wood. There are two main ways to do it. The first way is to sand it off, and the second way is to use a chemical stripper:
- Sanding: Use a coarse sandpaper, a sanding block or a power sander to strip the finish off until the surface is smooth. Once most of the finish is off, switch to medium grit sandpaper to further remove any shine. Finally, finish off with a fine grit sandpaper to smooth out the wood until all finish is completely removed. Don’t forget to evaluate your sanding job to end up with a perfect finish by referring to the Youtube video above.
- Chemical stripper: Chemical stripping products are designed to effortlessly strip the finish off wood. Choose a liquid or semi-paste product that that may or may not contain methylene chloride (MC). Spread the stripper over the surface of the wood evenly using a bristle brush.
Let the stripper sit for the amount of time recommended by the stripping product, the surface material should wrinkle up and you can peel it off with a scraper. Continue to use a scraper until you’ve scraped all the finish off. Apply a lacquer thinner to wipe down the wood and remove any leftover residue, finish, or wax from the stripper.
If you’ve never stripped finish off of wood before, here are some tips you can follow to make the job safer and easier:
- Wear protective gear including eye goggles and chemical-resistant gloves.
- Read the chemical stripper product label before beginning and follow as directed (especially the amount of time to let the stripper sit on the surface of the wood).
- Use drop cloths or cardboard underneath the furniture before sanding or using the chemical stripper.
- Apply chemical stripper using fast and even brush strokes as the product will begin to evaporate.
- Use a brush with natural bristles to get into grooves.
- Reapply another coat of stripper over the top if the finish doesn’t remove after 30 minutes of soaking.
- Let the piece air dry for 24 hours before moving on to the next step.
- Dispose of the leftover chemical products safely by first checking with your local waste disposal company.
Step 4: Apply a Coat of Sealant
After you’ve stripped the finish and let the piece fully dry, it’s time to move on to coating. If you’ve used a chemical stripping product, you may need to sand the furniture surface using 120 grit paper to ensure you’ve completely removed any residue.
An optional step is to fill in the grain of your wood furniture to your liking. If your furniture has a tight wood grain, then it won’t need grain filler. However, if your furniture has a more open grain such as with oak or mahogany woods, then you can apply a grain filler. You’ll need to choose the correct grain filling product depending on whether you want to emphasize or de-emphasize the grain and what the desired color will be in the end. Also check whether the grain filling product should be applied before or after staining.
Finally, you’ll want to seal the wood to prepare it for staining. A sealant product protects the wood and creates a base for the stain to spread more evenly. Apply a thick coat of sealant and allow it to soak into the wood. Wipe off any excess using a clean rag. Once the sealant has dried, sand down the furniture surfaces again with fine grit sandpaper.
Step 5: Stain or Paint the Wood
The next step after applying the sealant, is to stain or paint your wood furniture piece. This is a personal decision, and there isn’t necessarily a right or wrong answer. When choosing between staining or painting your wood furniture piece consider the following:
- If the piece is an antique, you may not want to paint over it so it can retain its authenticity.
- If you don’t like the existing color or grain of the wood, then you may prefer it to be painted a different color.
- If the piece will be used in a high-traffic area, it may be more resistant to damage with a stain and sealant than with paint.
- If the piece isn’t constructed from high-quality materials, then you may choose to paint it to make it look better.
There are several options to choose from when it comes to stains. There are water-based, oil-based or gel stains. There are also products that are a two-in-one stain and finish. Be sure to follow the instructions on the product label before beginning the staining step. Minwax is a great brand of stain to use. There are many colors to choose from so be sure to test the stain color on another piece of wood before applying to your furniture.
Paints also have multiple options to choose from. There are different paint finishes such as oil-based enamel or latex that will provide a durable coating. Follow the instructions on the product label before applying the coat of paint.
Step 6: Apply a Coat of Finish
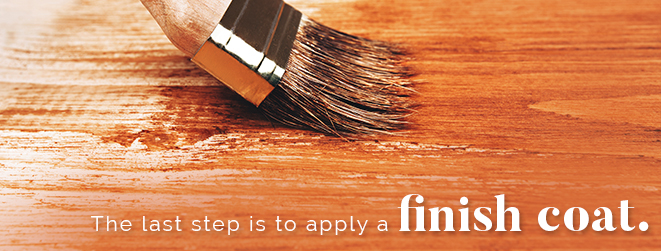
The last step after staining or painting your wooden furniture piece is to apply a finish coat. There are different finish products to choose from. Your choice will depend on several factors including:
- The wood furniture look you desire
- The durability you need
- The type of wood your furniture is made from
- How the item will be used and how frequently
- Your own skill level
Because certain finishes are meant to be sprayed on, they require additional spray tools to get the job done. For beginners and hobbyists, it’s recommended to use finishes you can wipe or brush on.
Here are some of the many types of brush- and wipe-on finishes to choose from:
- Oil finishes: These are easy products to come by, and they are simple to use. Oil finishes tend to soak into the wood well and make for easy rejuvenation later. They don’t offer much surface protection, so they are better to use on pieces like chairs or dressers instead of tabletops.
- Wipe-on varnish: Wipe-on varnish products can be applied in multiple coats if desired. This allows you to control the level of sheen that your furniture will have in the end.
- Polyurethane varnish: Oil-based brush-on polyurethane varnishes are durable and can protect your furniture from scratches and dents for years to come. This type of finish is suitable for coffee, dining and kitchen tables that suffer a lot of wear and tear. Polyurethane can take on a yellowish tint over time.
- Wax: Furniture wax is a mixture of oil-based and natural ingredients like carnauba or beeswax. When wax is first applied with a paintbrush or cloth, it appears dull. Buffing brings out a satin sheen.
- Water-based finish:Water-based sealants like polycrylic dry quickly with no toxic fumes. A water-based finish dries clear and will not yellow with age, although it can take on a milky appearance if you apply thick coats or use it heavily on top of dark wood.
- Shellac: Created from a durable resin secreted by lac bugs, shellac wood finish provides a hard finish on floors, furniture and antiques. This wax-like finish is mixed with a solvent and may need to be thinned before application.
- Lacquer:Available in glossy or matte coatings, lacquer is more durable than shellac and offers superior scratch protection on furniture. Always apply lacquer in a well-ventilated area due to fumes.
Once you’ve selected the best finish product for your specific furniture piece, you can add a coat of paste wax to enhance its luster and further protect it from scratches.
Last-Minute Tips on Refinishing Wooden Furniture
Now that you have a better understanding of the process of deciding when to refinish wood furniture and how to do it, here are some helpful tips to consider along the way:
- Use full or natural light: When staining or painting and finishing your wood furniture piece, be sure that you’re working in a fully lit space. This will help you to see any drips, runs or missed spots before it’s too late.
- Keep your workspace clean: Throughout the whole furniture refinishing process, remember to keep your workspace as clean as possible. This includes vacuuming up dust after sanding. Dust particles can get trapped to the wood’s surface and get underneath the stains and topcoats. Once you’ve vacuumed the dust, wipe down the wood with a damp cloth before applying the finish.
- Stir products: Never shake a container of stain or finish. Instead, gently stir the mixture to ensure all ingredients are properly dispersed and not settled at the bottom.
- Test the stain color: Don’t rely on what the samples tell you when deciding how the stain will look. Always test the stain first on a discrete area of your furniture before applying all over. This will prevent any unwanted surprises when you begin to cover the more prominent areas.
Preserving Your Wood Furniture
Once you’ve completed your wood furniture refinishing or restoration project, it’s important to maintain and protect your piece as much as possible. This includes regularly dusting and cleaning your piece and preventing damage.
If you’re looking to invest in new high-quality wooden furniture for your home, browse through our inventory at AmishOutletStore.com to see our beautiful selection of handmade dining, living and bedroom pieces. Our solid wooden furniture pieces come in a variety of finishes and will last for generations to come.








 Are you a visual person? Check out our video to see how easy our process is!