Spring Cleaning: Giving Your Home a Facelift in the New Year
The New Year is a time when people start making resolutions for personal change. Then, as the weather begins to warm up and bird songs fill the air, it inspires a different kind of change: spring cleaning. More daylight and higher temperatures have a way of invigorating us, filling us with energy to try new things and get stuff done, but deep cleaning your home won’t be tackled in the same way as making a cake or changing your hair color.
Sure, both baking and makeovers require certain tools, but they’re done in a snap. The concept of spring cleaning may sound attractive, but the time and effort it takes to tidy up your entire house can be daunting. That’s why AmishOutletStore.com offers this helpful home spring cleaning checklist. It breaks the major tasks down into individual chores, covering the tools you need and the methods you should use.
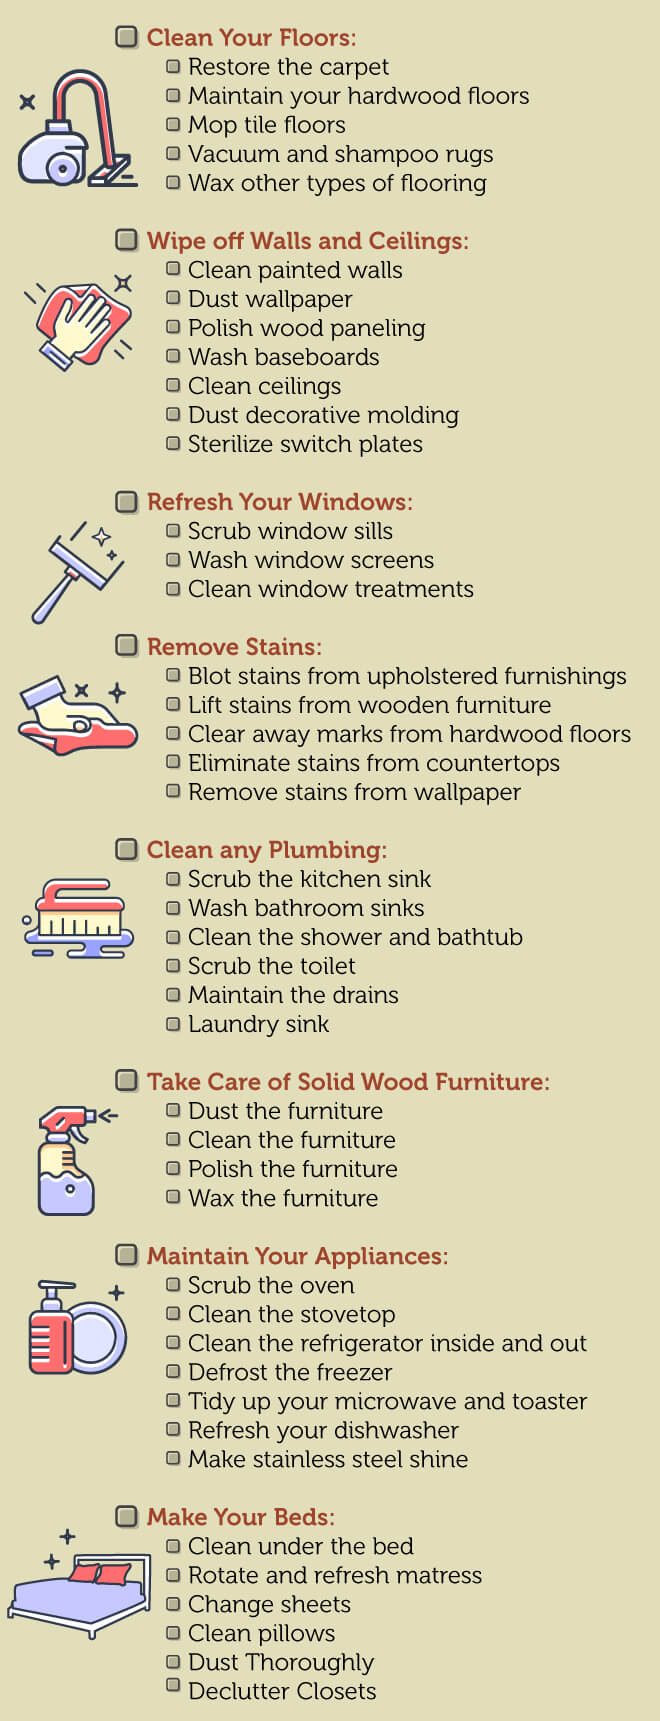
Clean Your Floors
Of course you probably give your floors a good sweep or vacuum every now and then, but aside from when you’re moving out, how often do you think about really getting them spotless? Different types of flooring require different cleaning supplies, and don’t forget about any area rugs! Here are a few floor care tasks you should complete:
- Restore the carpet: Beyond your regular vacuuming, sometimes you should deep-clean your carpets. Start by spot-cleaning problem areas with a little water and a drop of vinegar. Remember to blot, not scrub. Then do your research on what kind of carpet cleaning machine and detergent would work best for your type of carpet.
Read all of the instructions for the machine and cleaning solution, and follow them as closely as you can. To help the carpet dry quicker when you’re finished, open the windows or crank up the air conditioning with a fan blowing.
- Maintain your hardwood floors: Basic cleaning can be accomplished by dusting the floor with a mop treated with a dusting agent or by vacuuming with a floor-brush attachment. For a deeper clean, go out and purchase a wood-cleaning product. Dilute it properly, get a rag mop slightly damp, wipe off the floor, and rinse with water and a clean mop afterward if necessary. As it dries, be sure any excess liquid is taken care of so it doesn’t get a chance to damage the wood.
- Mop tile floors: For the tile in your bathroom or kitchen, you could purchase a cleaning product from the store or you could mix one up yourself. Combine half a cup of baking soda and two gallons of water, being sure you stir them together thoroughly. Then soak a sponge mop or string mop in the mixture and go to town. This works on both tile and the grout in between tiles.
- Vacuum and shampoo rugs: You can spot-clean rugs with club soda for most stains, while milk is best for blood stains. Any grease-based stains can be taken out with water and a tiny bit of ivory soap detergent. Over-cleaning can wear out rugs quickly, but it’s good to wash them on occasion. Prep the rug by vacuuming it thoroughly, lather it up with rug cleaner, rinse it with a garden hose, let it dry, and use a soft-bristled brush to loosen up the fibers afterward.
- Wax other types of flooring: There are plenty of polishes or liquid waxes out there made specifically for vinyl, linoleum or stone flooring. Make sure to read the label carefully to see what material the wax is meant for.
Wipe Off Walls and Ceilings
Certain walls, such as those in bathrooms or the kitchen, can get grimier than others. Small details such as trim and switch plates should not be overlooked, and even the ceiling gets dirty without being touched due to cobwebs forming. Here are a few solutions for cleaning walls, ceilings and any accessories around them:
- Clean painted walls: Painted walls can be simple to clean if they aren’t too dirty. Most of the time, only a clean cloth or moist sponge is required. For problem areas, you can use a tiny bit of mild soap or dishwashing liquid, either squirted onto the sponge or applied directly to the spot. Be careful what kind of product you use, and always be sure to rinse the soap off afterward with water.
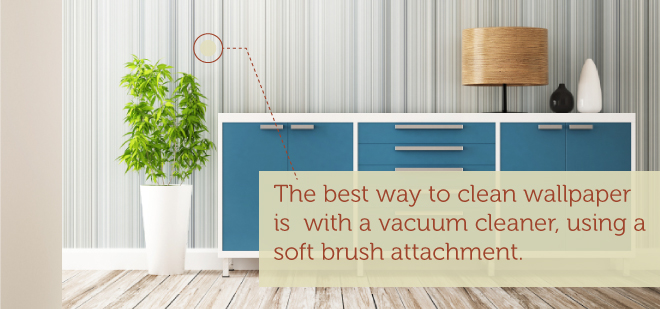
- Dust wallpaper: Because wallpaper is delicate, the best way to clean it is with a vacuum cleaner, using a soft brush attachment. Simply start at the top of the wall and work your way down. If your wallpaper isn’t textured, a clean lint-free cloth wrapped around the end of a broom will work just as well. For wallpaper that receives more wear, such as kitchen wallpaper exposed to grease and steam, it can be gently wiped off with a damp sponge with a small squirt of dish detergent.
- Polish wood paneling: If your home is covered in this remnant from another era, occasionally it requires more than just your everyday dusting. To deep clean it, make an extra-strength solution that’s one part apple cider vinegar and two parts water. Spray this on a microfiber cloth and clean the paneling in sections. Afterward, you can wipe the paneling with a microfiber cloth and let it dry, and if you really want it to shine, buff it with another clean cloth dotted with mineral oil.
- Wash baseboards: There are loads of methods out there for cleaning baseboards. If yours aren’t super dirty, you can give them a good dusting with a handheld broom or even a clean paint brush. For those with a fair bit of grime, have a stack of erasing sponges handy, along with a bucket of soapy water or a vinegar and water mixture. Then use cotton swabs for any tight corners.
- Clean ceilings: This is another area where a lint-free cloth attached to a broom or a vacuum with a soft brush attachment will usually work wonders. For tougher messes, such as kitchen spatters, you can use all-purpose cleaner and rinse it off with clear water and a sponge. Ceilings rarely ever attract serious messes, but if yours was subjected to smoke or water damage, consider calling a professional to get it cleaned.
- Dust decorative molding: Most of the time cleaning trim with a feather duster, a vacuum brush attachment, or a soft paint brush will suffice. For sections that are covered in dirt, spray them with an all-purpose cleaner, rinse them with water, and dry them off by wiping them with a soft cloth.
- Sterilize your switch plates: Light switches are some of the dirtiest, most germ-packed things in your house, but getting them clean is as easy as one, two, three. Just spray household cleaner onto a paper towel and wipe off the plate, then use a cotton swab to clean the switch. Afterward, buff it dry with a cloth.
Refresh Your Windows
There are a few components around your windows that need to be tended to besides just the windows themselves. The window sill and tracks easily collect dirt, and the window treatments become laden with dust over time. Spring cleaning for your home would never be complete without tackling your windows, so here are some tips:
- Scrub window sills: Soak a cloth in hot soapy water and wipe down the sill. That should do the trick. However, if you want to get really in-depth and clean the window tracks too, that takes a little more effort. Prep the tracks by vacuuming them with the brush attachment, then spray them with white vinegar. Let it sit for a while to loosen up the grime before you wipe it away with a paper towel. All those hard-to-reach nooks and crannies can be taken care of with cotton swabs
- Wash window screens: Simply use a brush dipped in warm water and a mild dish soap to scrub your window screens. Make sure you rinse them thoroughly and let them dry completely.
- Clean window treatments: Your curtains or draperies might actually be machine washable. Check their tags to find out. Fabric shades often need to be dry cleaned, wooden window blinds can be wiped off with a damp cloth, and metal or vinyl blinds should be cleaned with water and a mild dishwashing liquid. If you’ve really got spring fever, swap out your heavy curtains for lighter ones and clean off the old window treatment later.
Remove Stains
Generally, it’s best to deal with stains as soon as they occur. However, if it’s an accident that occurred when you weren’t at home or were preoccupied with other things, that’s okay. There are still ways to take care of it. Here are just a few:
- Blot stains from upholstered furnishings: To remove stains from upholstery, start by blotting up the mess and flushing it with cold water. Repeat this process as necessary. If there’s a residual odor after the stain starts to vanish, mix one part water and one part vinegar and rinse it off again. Any further problems after that mean you should probably call in a cleaning expert.
- Lift stains from wooden furniture: There are loads of strange solutions for removing stains from wood furniture, from baking soda and salt to petroleum jelly and toothpaste. A simple way to remove water marks from the coffee table is to mix one part vinegar and one part olive oil and apply the mixture with a soft cloth, being sure to move in the direction of the wood grain. Another soft cloth can be used afterward to make the wood shine again.
- Clear away marks from hardwood floors: Most types of marks, such as pet stains or water marks, can be dealt with by using super fine steel wool and floor wax. Oil-based stains can be removed by rubbing them with dish detergent on a soft cloth and rinsing with water. If necessary, lightly sand the spot, stain the wood, and wax and buff the area so it doesn’t stand out from the rest of the floor.
- Eliminate stains from countertops: The key to keeping your counters looking brand new is to have them sealed properly after they’re first installed and resealed about a year later. If you’re a bit behind on this upkeep, fear not. Rust marks can be cleared away with a poultice, and mildew or soap scum can be cleaned off with a mixture of half a cup of ammonia in a gallon of water. Other common stains can be taken care of with a small amount of hydrogen peroxide and ammonia in water.
- Remove stains from wallpaper: Though you can’t use any heavy-duty cleaning products on wallpaper, there is a specialized solution sold at home centers and paint stores called wallpaper dough. Just roll a handful of the dough across a dirty spot and it will lift it right off. Then if the dough ever gets covered in dirt, knead it around to bring out the fresh dough from inside the ball.
Clean Any Plumbing
That’s right, probably your least-favorite job is on this list. Unfortunately, it’s something that just has to be done. To keep your household plumbing functional and odor-free, follow these tips:
- Scrub the kitchen sink: For your average stainless steel kitchen sink, you can cover it in warm water and rub in some baking soda to dissolve a lot of the grime. Let it sit for a while, then rinse it with water and wipe it dry with a clean cloth. If you want to go all the way and disinfect the sink too, soak some paper towels in white vinegar and cover the sink with them. Make sure to thoroughly rinse again after removing the paper towels.
- Wash bathroom sinks: The bathroom sink has a way of getting covered with hair, toothpaste, makeup and all kinds of other messes. The same steps that work for stainless steel sinks also apply here. Again, be sure to leave enough time for the baking soda to loosen grime and the vinegar to work its sterilizing magic.
- Clean the shower and bathtub: Rinse your shower or tub with hot water before you start. For the lightest soap scum, spray it with a mixture of white vinegar and warm water, let it sit, then wipe it off and rinse it. Heavier grime requires sprinkling with baking soda before using the solution of vinegar and water. Scrub them together until they make a paste, wait a while for it to work, then wipe and rinse.
- Scrub the toilet: No matter what toilet bowl cleaner you choose, the key is to start under the rim and let the solution run down the edges of the bowl. Let it soak in for a while before you give it a good scrubbing, too. An extra step you could add that eliminates even more germs is to spray the outside of the toilet with disinfectant, then wash it out with hot water and a sponge.
- Maintain the drains: Expensive products will clear out your drains easily, or you could whip up a home mixture yourself. Start out by pouring a pot of boiling water down the drain, followed by half a cup of baking soda. After a few moments, chase it with a combination of one cup of vinegar and one cup of hot water. This’ll create quite the reaction, so put in the drain plug and let it work its magic. Ten minutes later, pour some more boiling water down the drain, and you’re set.
- Don’t forget the laundry sink: Though it’s probably tucked in the basement or a back room somewhere, you shouldn’t leave out your laundry sink. It needs a quick clean as well, similar to your kitchen or bathroom sink.
Take Care of Solid Wood Furniture
Because wood is one of those materials that can be quite sensitive, it’s important to know how to care for solid wood furniture. Here are a few basic instructions:
- Dust the furniture: Regular dusting should already be built into your routine to prevent dust from settling on the wood. To really scare the dust away for a few days, you can wipe off your dining cabinets with a damp terry cloth. This more efficiently captures all those tiny particles.
- Clean the furniture: As mentioned before, the main thing to remember when cleaning wood is to move with the grain, not against it. Otherwise, just don’t use any harsh cleaners. Opt for mild soap or dish detergent on a lint-free cloth.
- Polish the furniture: If you want your guests to admire your beautiful dining table, give it a polish before they arrive. Different woods and finishes require different mixtures, but generally polishes that include silicon will make the shine last longer.
- Wax the furniture: Waxing your furniture once a year helps protect the finish long-term. Don’t settle for any lesser quality products here. Go with a nice paste wax, applied lightly with a cotton cloth.
Maintain Your Appliances
Spring cleaning for the home should definitely include upkeep for your various appliances. Each one of them, from the refrigerator to the washing machine, impacts your everyday living. Here are some projects you should undertake:
- Scrub the oven: Lots of ovens have a self-cleaning function nowadays, but if you’d rather do things the natural way, baking soda paste will do the trick. Take out the oven racks, cover the interior in the paste, and let it sit overnight. Then wipe away as much as possible with a damp cloth and scrape away any stubborn remnants. Finish up with a light vinegar spray before attacking the residue with a final wipe down
- Eliminate messes from your stovetop: Baking soda paste is a common household solution, and it works for any gunk on your stovetop or hidden under the burners as well.
- Clean the refrigerator inside and out: Wipe up any interior spills, and dust the often-forgotten refrigerator coils. Make sure no electricity is being sent to the appliance when you do this.
- Defrost the freezer: Also be sure the power is turned off when defrosting your freezer. Then remove all the food, let the ice melt, and clean it off with baking soda and water. Any lingering moisture will only freeze again, so be sure to wipe it away.
- Tidy up your microwave and toaster: Splatters and food are all too common in microwaves. Clean up your microwave so it won’t be smelly, and clear out all the crumbs from your toaster.
- Refresh your dishwasher: Empty out the dishwasher racks and use a water and vinegar solution to clean around the edges. If there is any food lodged in the parts, dig it out with tweezers, and remove the filter to soak a while. Once you put everything back together, sprinkle baking soda inside, put vinegar inside the detergent holder, and let it run on the heavy duty cycle.
- Make stainless steel shine again: The stainless steel finish on appliances is gorgeous, but it can also be quite finicky. Any sort of abrasive products should never be used. The easiest way to clean fingerprints or smudges from stainless steel is misting it with a wax-based aerosol spray, followed by gently wiping it off with a lint-free cloth.
Make Your Beds
Your bed is where you end up spending about one third of your day, so don’t you think it deserves a little attention as well?
- Start by cleaning under the bed: All kinds of dust bunnies can build up underneath your bed! Not to mention, if you’ve used it as a place to store junk, you should probably dig up those items and give them some serious consideration before putting them back.
- Rotate and refresh your mattress: To keep odors from settling into your mattress, sprinkle it with baking soda, let it sit for a few minutes, then vacuum it up. It’s also good to routinely rotate your mattress so it gets worn evenly on both sides.
- Change your sheets: Dirt and natural body oils have a way of penetrating your blankets. Spring cleaning is the perfect excuse to throw your sheets in the laundry and replace them with a fresh set.
- Clean your pillows: Sweat, body oils and drool gradually soak into your pillows overnight. That may be a gross image, but luckily there’s a solution aside from throwing them out when they get too old. Consult the care instructions on the tag, as you may be able to run them through the washer and dryer.
Dust Your Home Thoroughly
Remember to work from the top down so any dust flying around will be taken care of by the end. There’s a seemingly endless number of things you could dust, so here are just a handful that are more likely to be overlooked:
- Light fixtures
- Artwork hanging on the walls
- Lampshades
- Bookcases
- Fine china on display
- Computer monitors and television screens
- The top of the toilet tank
- Blades of ceiling fans
Declutter Your Closets
This goes for closets, cabinets and drawers. There’s always something you can donate, give away, or throw away. Your attic and basement aren’t exempt either. Look with a critical eye at some of these areas:
- Throw out old food from the refrigerator or pantry.
- Reevaluate the items in your linen closet.
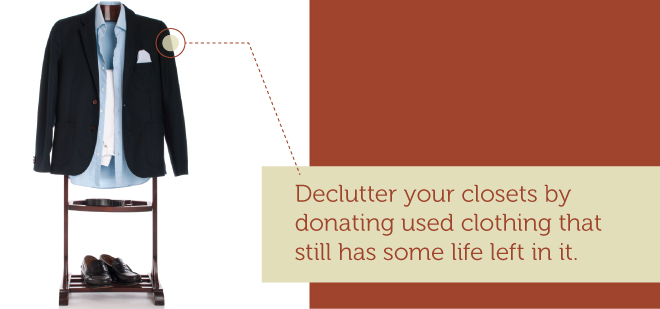
- Donate used clothing that still has some life left in it.
- Give away your child’s old toys that they no longer play with.
- Reorganize bookshelves and other media collections such as music, movies, magazines and games.
- Sort your family photos.
- Organize your medicine cabinet, discarding expired cosmetics or beauty products.
Congratulations on Finishing Your Spring Cleaning Checklist
There are always plenty of things that could be cleaned in your home, such as stairs to be swept and handrails to be wiped down. Shining your door and window hardware and washing your mirrors deserve a spot on the agenda. There are also numerous maintenance tasks you should complete, from resealing grout lines to changing the batteries in your smoke detector. Your knives could probably use a good sharpening, too.
There’s even lots you could take care of outdoors. Mow the grass, sweep the porch, scrub the walkways, and wash any outdoor furniture. Sometimes it feels like the cleanup never ends. Though it isn’t hard to get overwhelmed, these spring cleaning tips are an excellent start.
Maybe after you’re finished cleaning and decluttering, you’ll want to reward yourself for all your hard work. This could come in the form of a special dessert, an evening of relaxation, or even a new furniture purchase. To treat yourself for less, subscribe to the AmishOutletStore.com newsletter. There are always great deals and discounts available, and your subscription will bring them to your attention so you never miss out.


 Are you a visual person? Check out our video to see how easy our process is!